
Knowledge Base
How to migrate user data in G Suite?
You can migrate email using the data migration service, if your legacy environment is listed below.
- Microsoft® Exchange Server 2003, 2007, 2010, 2013, 2016, or Exchange Online (Office 365®)
- A webmail provider that uses the IMAP protocol, such as Bluehost®, Yahoo!®, or Zoho®
- Another G Suite account
- A personal Gmail (@gmail.com) account
We will discuss about Migrating email from IMAP-based webmail providers in this Article:
Step 1: Set up the data migration service
- Sign in to your Google Admin console. Sign in using an account with super administrator privileges by accessing below URL: admin.google.com
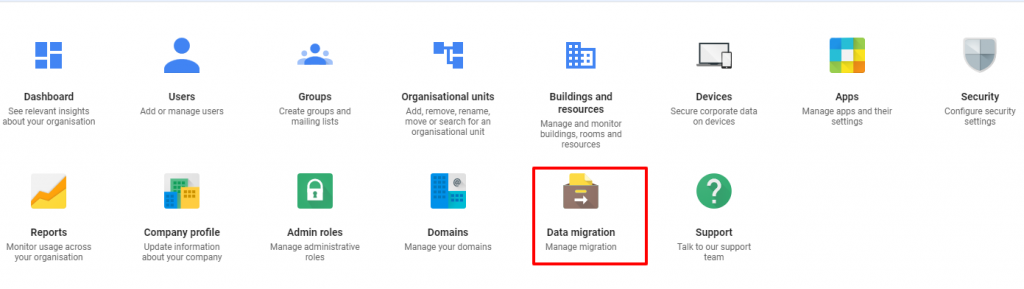
- From the Admin console Home page, go to Data migration.
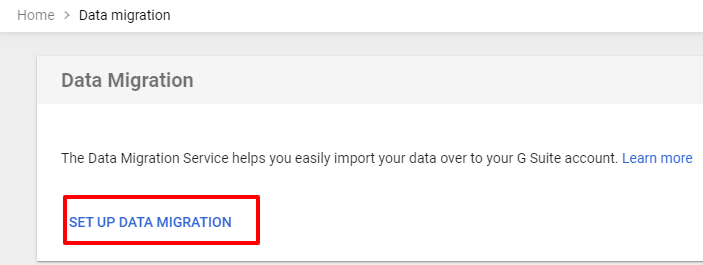
- Click Set Data Migration Up.
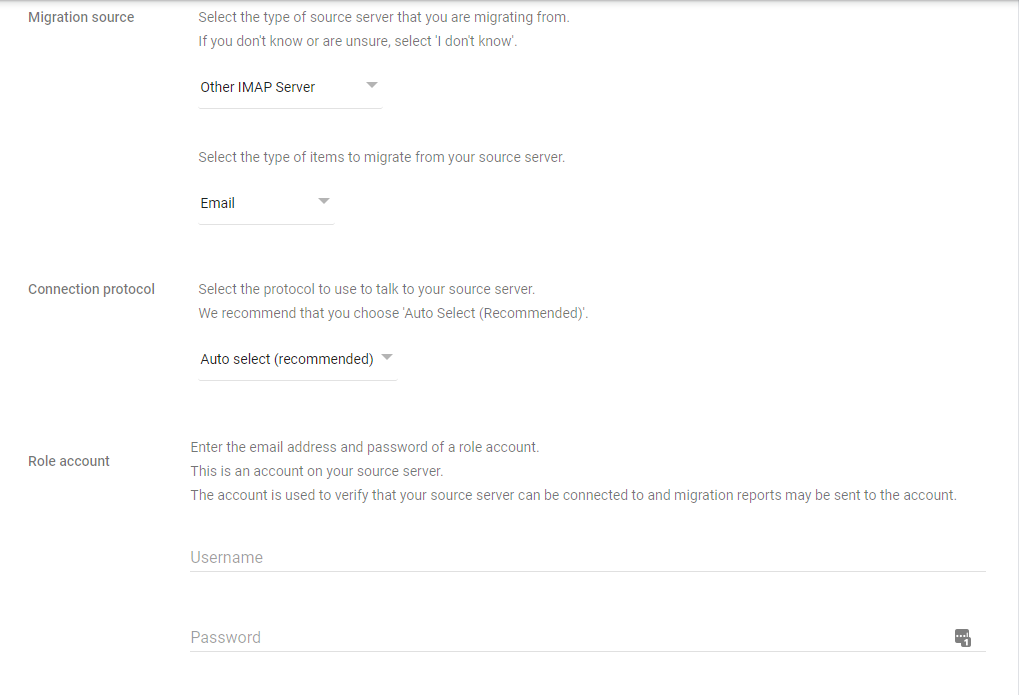
- Under Migration Source, select GoDaddy IMAP or Other IMAP Server. Make sure Email is selected as the data type.
- Under Connection Protocol, choose an option:
- Auto Select (Recommended)
- IMAP and in the Server URI field, enter your IMAP server name (for example, imap.yourdomain.com).
- Under Role Account, enter the email address and password for your role account.
- Click Start.
Note: If the connection fails, verify the role account and connection protocol information is correct. Then, click Start again.
- Under Migration Start Date, accept the option that appears or choose a start date for your migration.
- Under Migration Options, accept the options that appear or choose to exclude some data.
- Click Select Users.
Step 2: Migrate email from IMAP-based webmail providers
Before you begin to migrate, complete the steps-1 above to set up the data migration service. Then, choose whether to migrate email for a single user or for multiple users.
Migrate email for a single user:
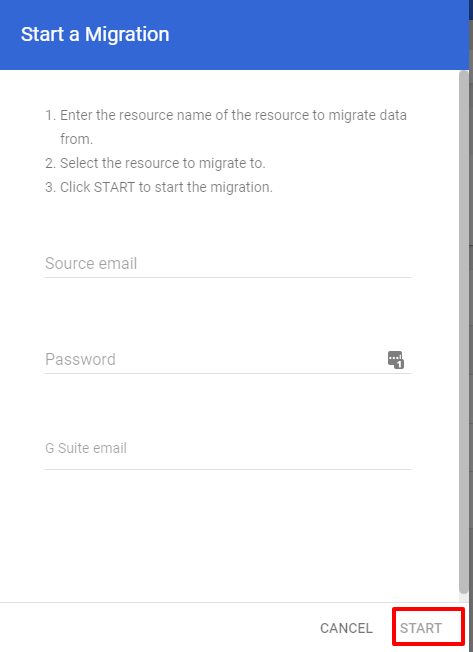
- Click Add user.
- In the Source Email field, enter the user’s legacy email address.
- In the G Suite Email field, start typing the user’s new G Suite email address and choose from the list of suggested users.
- In the Password field, enter the user’s password for their legacy email account.
- Click Start.
Migrate email for multiple users:
- Click Bulk upload with csv.
- Click Attach File to upload the migration CSV file containing the legacy email addresses and the new G Suite email addresses.
- Click Upload and Start Migration.
- If there are errors in your file, choose an option:
- To update the file, click Cancel. Then, upload the updated file.
- To ignore the incorrect mappings, check the Ignore errors box.
Note: To exit a completed migration,
- click More >> Exit migration.